CELEBRATING WHO WE ARE AND WHO GOD MADE US TO BE. LOVING OUR COILS, OUR CURLS, OUR KINKS, LEARNING TO BE COMFORTABLE IN OUR OWN SKIN COZ EMBRACING WHO WE ARE IS THE FIRST STEP TO KNOWING THE TRUE BEAUTY WITHIN US.
Monday, 24 March 2014
READ MY FEATURE ON ZEDHAIR REQUEST
HAIR UPDATE: NEW ADDITION TO MY REGIMEN: AMLA POWDER.
Hey guys, how are you doing?
I just wanted to come out here and update you on a few
changes in my regimen.
Two months ago I went to buy my coconut oil from Adams
Spice shop and I came across amla powder. This was actually the first time I
was seeing it. I used to use amla oil in the first few weeks of my hair journey
but I do not anymore, for no particular reason really. Having used the oil in
the past, I decided to try the powder this time around.
Before I go into how I use the amla powder in my regimen,
here is a little info on amla.
Benefits of amla:
- Improves hair growth.
- Imparts shine.
- Prevents premature greying of hair.
- It enhances hair colour when used with henna.
How I use it.
I either add it to my deep conditioner mix or I just make a
paste by adding water to the powder. I don’t use it often, just once in a
while.
My experience
I love it!!! It makes my hair feel so strong, as in I can
actually feel the strength in my hair whenever I handle it and it also makes my
hair shiny. The only thing I don’t like is the application of the paste,it can be very messy and one needs to be in the bathroom to do it. Another thing is, if mixed with oils, amla is difficult to rinse out.
The verdict
I would certainly recommend it to anyone who wants strong healthy hair and it will surely stay in my regimen.
Ladies, have you tried using amla powder or oil for your
hair? Share your experience in the comments below.
Wednesday, 19 March 2014
HOW I DETANGLE MY HAIR.
From the start of my hair journey, I detangled my hair when
it was wet i.e after deep conditioning. I thought it was ok as long as I used a
conditioner with a lot of slip and as long as I had a wide tooth comb with me.
Well, recently I tried to detangle my hair with olive oil
while it was still dry and I used my FINGERS!!!!!!!!! No wide tooth comb or
denim brush or tangle teezer . A few months ago, if you had talked to me about “finger
detangling” I’d have told you “Nigga please! Whose got time for that??’ But now
I like it and I think il be doing that a lot more.
Finger detangling is using your fingers to comb your hair and remove all the knots and tangles without the use of combs, brushes or any other hair tools.
PRO’s of finger detangling.
There is less hair loss during the process. Fingers are
sensitive unlike combs and are able to deal with tangles and knots without tearing
the hair apart.
CONS of finger detangling.
It takes FOREVER!!!!!!!!!!! OMG. It is the most time
consuming process in my natural hair care. And sometimes I actually dread it. *sigh*
TIPS FOR SUCEESSFUL DETANGLING:
- Be patient.
- Detangle from ends to roots and not the other way round.
- Work in sections, this helps a lot.
- Use an oil or a conditioner to add slip.
Do you do a wet detangling or a dry detangling??? Which one
do you prefer?
HOW TO MOISTURISE YOUR HAIR EFFECTIVELY - THE LOC METHOD.
It’s the commonest song in the hair community, it’s the
language everyone speaks, it is called moisture.
Our hair needs moisture to thrive. Dry hair will break off
and prevent you from retaining length, so if you want long beautiful hair down
your back you’ve got to take time to moisturise your hair regularly.
How do you moisturise your hair effectively?????
You will agree that hair feels so soft when you wash it and very hard the moment it dries.
That is because our hair loses the moisture as it dries and its kinda like
adding water in the first place was all in vain.
To prevent loss of moisture after washing, you can use the
loc method.
O-Oil
C-Cream
Liquid could be plain water or your favourite leave-in conditioner. You can then follow this with your favourite hair oil e.g olive oil, castor oil etc. To seal everything in, you then add your hair cream or your shea butter, mango butter etc.
The sealing with your oil and cream helps keep the moisture
inside your hair strands and prevents hair from drying up too quickly.
Have you tried the LOC method???? How did you like it?
Thursday, 6 March 2014
ZEDHAIR WORKSHOP.
|
WHAT AM LOVING - Adepero Oduye and Lupita Nyon'go
If you have watched '12 YEARS A SLAVE', then you probably know these two beautiful actresses.
I love their natural look and their confidence, they just do it for me.
CONGRATULATIONS to LUPITA for winning the Oscar for best supporting actress in 12 Years a slave.
Check out my favourite pics of the two actresses.
ADEPERO ODUYE
LUPITA NYON'GO
SOURCE:here
Ladies what do you think? Beautiful right?????
DO YOU PROTECT YOUR HAIR WHEN YOU SLEEP??????????
You may be wondering why there's need to protect your hair when you sleep, and from what.
Well unless otherwise, most of us sleep on cotton bed sheets and cotton pillow cases. Cottton unfortunately absorbs moisture from our hair while we sleep.
You could experiment by adding some oil in your hair tonight and observe how oily your pillow, not your hair, will be tomorrow morning. Plus the friction between your hair strands and the cotton fibers could actually cause breakage.
So, how then can you protect your hair?
You can protect your hair from the drying effects of your cotton pillow cases by covering your hair with a satin or silk scarf, a satin bonnet or by sleeping on a satin pillowcase.
Why satin? why silk?
These two materials do not dry out your hair and there is little friction with your hair.
The benefits of wearing a satin bonnet or similar head covering include: minimizing tangling, frizz, damage and general sleep wear and tear.
Ladies how do you protect your hair at night?????????
Saturday, 1 March 2014
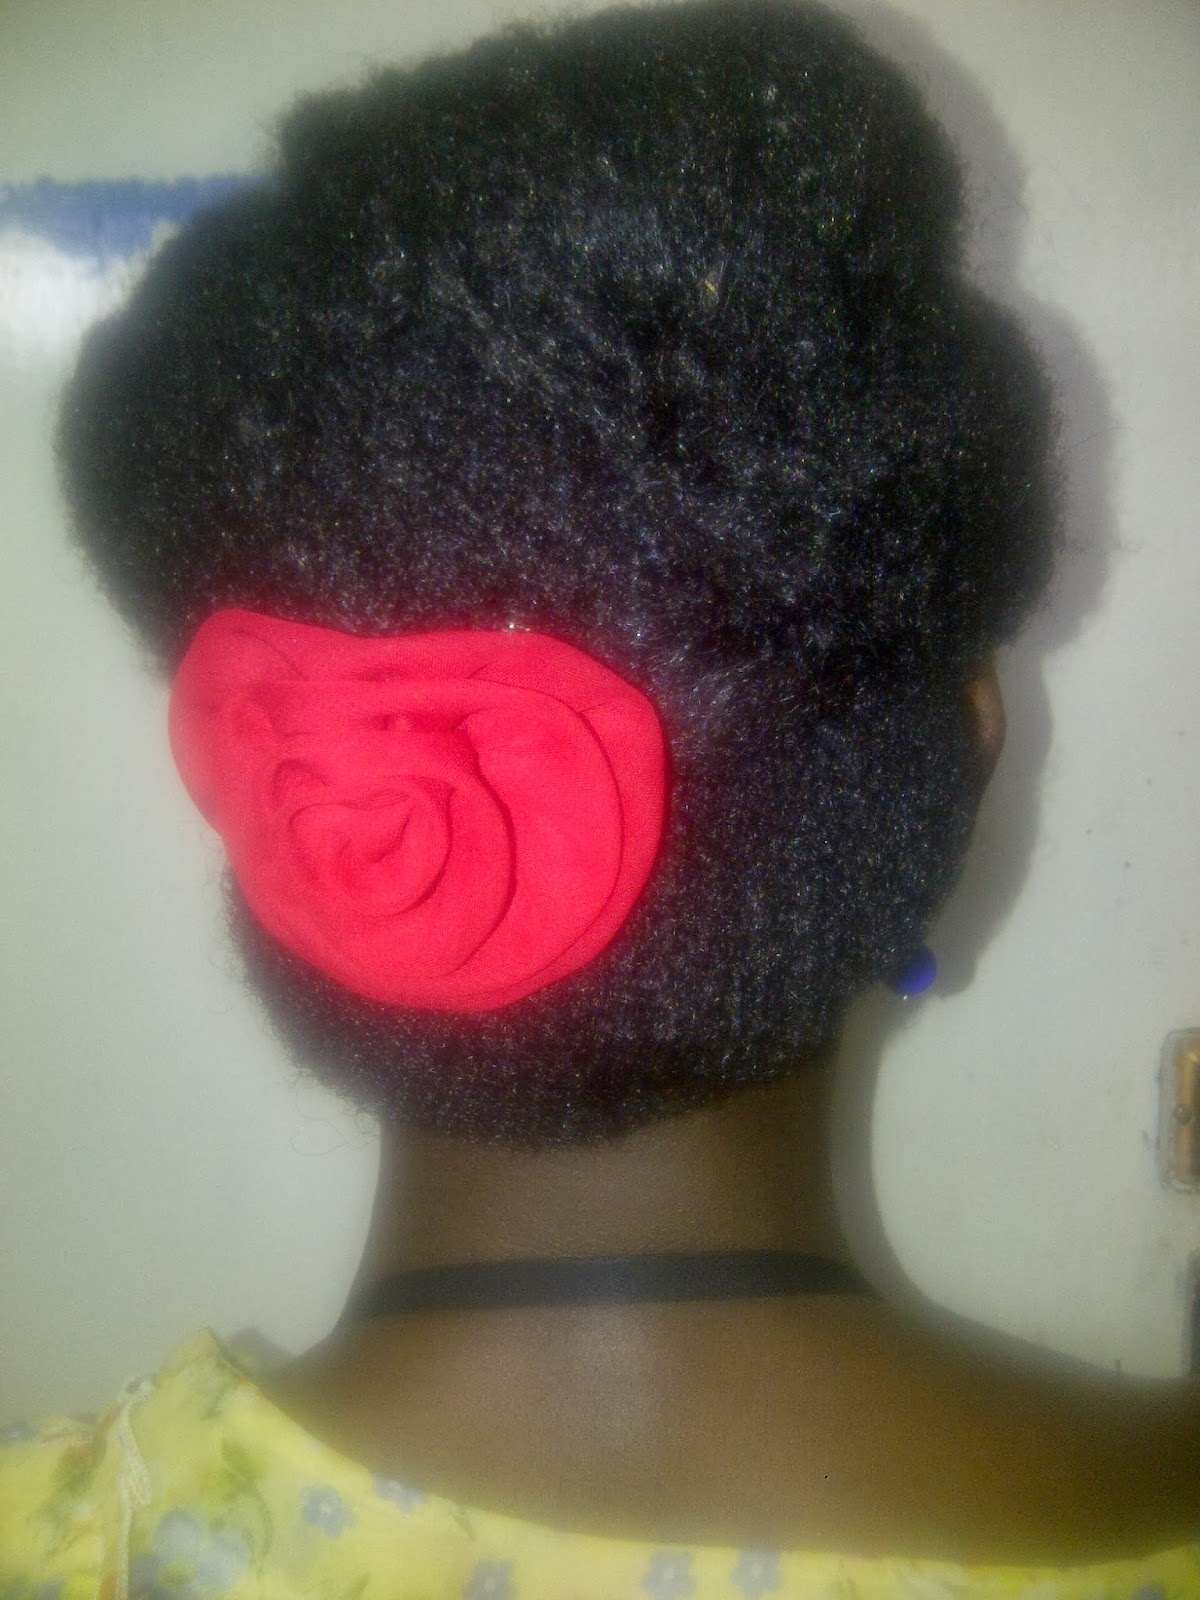
MY STYLE - UPDO
INSTRUCTIONS:
- Make three sections: front middle and back.
- Twist the front sections and set it with rod sets (previous night)
- The following morning, undo twists and separate them.
- Pin the back section under itself.
- Pin the middle section under itself but over the back section
- Lastly ACCESSORISE!!!!!!!!!
XOXO....
Subscribe to:
Comments (Atom)


 F
F


